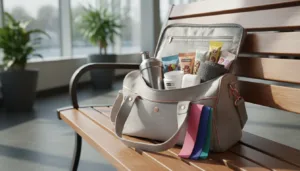
We’ve all been there. You reach into your gym bag three days later and find the protein shaker you forgot to rinse. The smell hits you before the lid is even fully off. It’s not a character flaw — it’s just what happens when protein meets warmth and time. The good news? Keeping your shaker fresh is genuinely simple once you know the basics. Here’s everything you need to know about cleaning your protein shaker properly — and keeping it that way.
Why Protein Shakers Get So Smelly
Before we get into the how, it’s worth understanding the why — because knowing what causes the problem makes the solution much more obvious.
Protein powder — whether whey, casein, or plant-based — is an organic material. When residue is left sitting in a warm, sealed container, bacteria get to work fast. They feed on the leftover protein, multiply, and produce volatile sulphur compounds as a byproduct. That’s the unmistakable smell. It’s not just unpleasant — it means bacteria are actively growing inside your shaker.
The warmer the environment, the faster it happens. A shaker left in a gym bag, on a kitchen counter in summer, or in a warm car can start developing that smell within just a few hours. Add a sealed lid trapping moisture inside, and you’ve created the perfect conditions for bacterial growth.
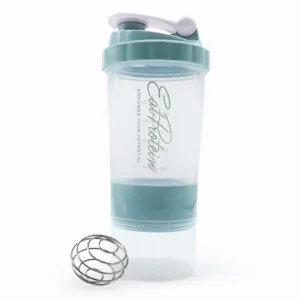
This is also why the lid, seal, and mixer ball are usually the worst offenders. Protein residue gets trapped in the threads of the lid, underneath rubber seals, and around the mesh or ball mechanism — places that a quick rinse doesn’t reach. If your shaker smells even after washing, those hidden spots are almost always the reason.
The Golden Rule: Rinse Immediately
If you take one thing from this article, make it this: rinse your shaker as soon as you finish your shake. It doesn’t need to be a full wash — just fill it with water, give it a good shake, and empty it out. If you’re at the gym, the water fountain will do.
This single habit makes more difference than any cleaning hack. Protein residue that’s been rinsed away within minutes never gets the chance to dry, stick, or start breeding bacteria. It’s the difference between a quick wash later and a full decontamination mission.
If you know you won’t be near a sink for a while, fill your shaker with water after you’ve finished your drink. It won’t stop bacteria entirely, but it keeps residue from drying onto the surface — and dried-on protein is significantly harder to shift.
Daily Cleaning: How to Wash Your Protein Shaker Properly
A daily wash doesn’t need to be complicated, but it does need to be thorough. Here’s a simple routine that works.
What you need
- Warm water (not boiling — especially for plastic shakers, which can warp)
- Washing-up liquid
- A bottle brush or sponge
Step by step
- Disassemble everything — take off the lid, remove the rubber seal if it comes out, and take out the mixer ball or mesh insert. These parts need to be washed separately, not just rinsed as a unit.
- Wash each part with warm, soapy water — use a bottle brush to reach the bottom and sides of the main cup. A smaller brush (an old toothbrush works brilliantly) is perfect for scrubbing the lid threads and seal groove.
- Rinse thoroughly — soap residue left behind creates its own slightly odd taste, so rinse every part under running water until it’s completely clear.
- Leave it open to dry — this is the step most people skip, and it matters more than you’d think. We’ll cover why in a moment.
That’s it. Five minutes, no special products. If you’re making protein shakes daily, this routine keeps your shaker fresh without any deep cleaning needed between uses.
Deep Cleaning Methods for Stubborn Smells
Even with good daily habits, a weekly deep clean helps keep things properly fresh — particularly if you use your shaker heavily or notice a faint smell starting to linger. Here are the methods that actually work.
Baking soda and white vinegar
This is the classic combination, and it works because it tackles the problem from two angles. Baking soda is a mild alkali that neutralises acidic odour compounds, while vinegar is a natural antibacterial.
- Add a tablespoon of baking soda to your shaker
- Pour in enough warm water to fill it about halfway
- Add a good splash of white vinegar — it will fizz, which is exactly what you want
- Let it sit for 30 minutes to an hour (longer for stubborn smells)
- Scrub with a bottle brush, rinse thoroughly, and air-dry
Do the same with the lid and seal in a small bowl. The fizzing action helps lift residue from crevices that scrubbing alone can’t reach.
Denture cleaning tablets
This one sounds unlikely, but it’s remarkably effective. Denture tablets are specifically designed to remove organic residue and kill odour-causing bacteria — which is essentially the same problem you’re dealing with in a protein shaker.
- Fill your shaker with warm water
- Drop in one or two denture cleaning tablets
- Leave overnight
- Rinse and dry
This is particularly good for shakers that have developed a persistent background smell — the kind that’s not strong enough to notice immediately but becomes obvious when you put your nose close.
Bottle brush technique
A good bottle brush is worth the small investment. Look for one with stiff bristles that can reach the bottom corners of your shaker without you having to force your hand in. A separate small brush — a dedicated lid brush or a repurposed toothbrush — makes a real difference for cleaning the lid threads, the drinking spout, and the seal groove where old residue loves to hide.
Scrub in circular motions rather than just back and forth. Pay extra attention to any textured surfaces or printed areas where residue can cling. If your shaker has a mixing mesh rather than a ball, hold it under running water and use the brush on both sides.
Drying: The Step Everyone Forgets
Here’s something that surprises a lot of people: most shaker odour comes from improper drying, not improper washing. You can wash your shaker perfectly, but if you snap the lid back on while it’s still damp inside, you’ve just sealed in the moisture that bacteria need to thrive.
After washing, always:
- Leave the lid off — or better yet, store the lid separately from the cup
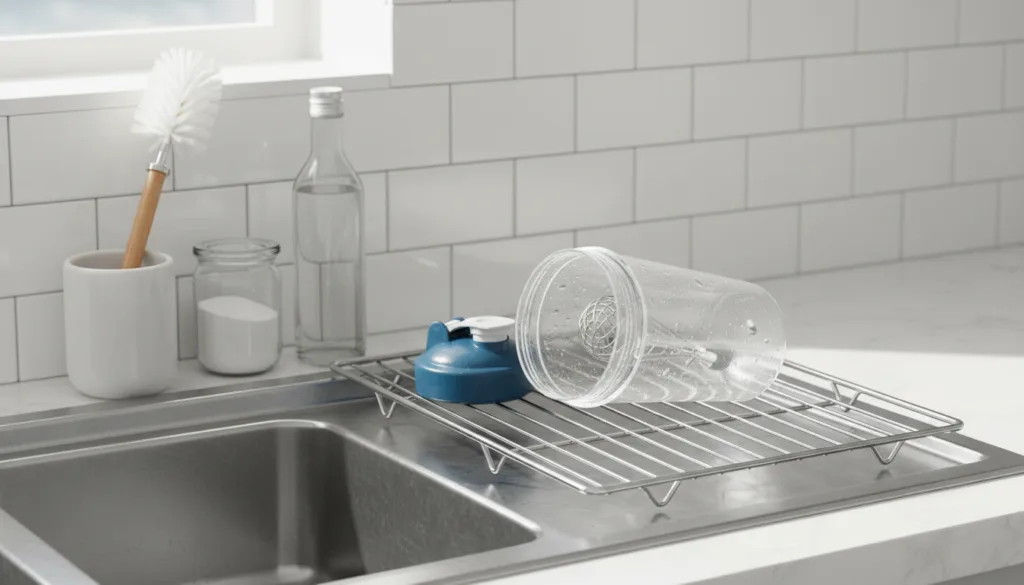
- Stand it upside down on a drying rack — so water can drain out rather than pooling at the bottom
- Let the seal and mixer dry separately — rubber seals in particular hold moisture, and popping a damp seal back onto the lid traps it
- Wait until it’s completely dry before reassembling — this might mean leaving it overnight, and that’s absolutely fine
If you’re packing your shaker for the gym the next morning and it’s not fully dry yet, throw a piece of kitchen roll inside to absorb residual moisture. It’s a small thing that makes a genuine difference.
How Your Shaker Material Affects Cleaning
Not all shaker bottles are created equal when it comes to keeping things fresh, and the material makes more difference than most people realise.
Plastic shakers
Most standard protein shakers are made from BPA-free plastic — typically polypropylene or Tritan. Plastic is lightweight and affordable, but it has a structural disadvantage: plastic is porous at a microscopic level. Over time, odour molecules from protein residue can absorb into the surface itself. That’s why older plastic shakers often smell even when they look perfectly clean. No amount of scrubbing removes what’s embedded in the material.
Plastic is also more prone to scratching, and those tiny scratches create more surface area for bacteria to cling to. If your plastic shaker has visible scratching on the inside, it’s worth replacing it — cleaning becomes a losing battle once the surface is compromised.
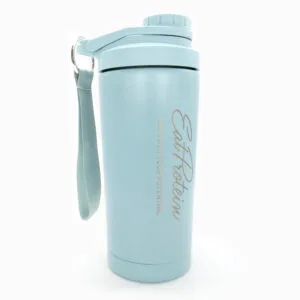
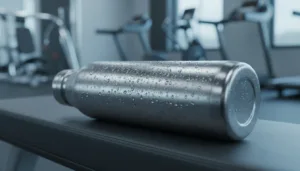
Stainless steel shakers
Stainless steel has a non-porous surface, which means odour molecules can’t absorb into the material the way they do with plastic. When you clean a stainless steel shaker, you’re cleaning the actual surface — not trying to extract smells from within it. This is why stainless steel shakers stay fresher for longer with less effort.
Steel is also naturally more resistant to scratching and doesn’t degrade over time in the same way. It handles hot water without warping, is generally dishwasher-safe, and doesn’t discolour from smoothies or coloured supplements. If you’ve been fighting a losing battle with a smelly plastic shaker, switching to stainless steel often solves the problem entirely.
Our stainless steel shakers are designed to stay fresh — the non-porous surface doesn’t absorb odours, so cleaning is straightforward and your shaker stays smelling like new. If you’re tired of the plastic smell problem, it might be time for an upgrade.
When to Replace Your Protein Shaker
Even with the best cleaning routine, shakers don’t last forever — especially plastic ones. Here are the signs it’s time for a new one.
- Persistent smell that won’t shift — if you’ve tried every deep clean method and the smell keeps returning, the odour is likely embedded in the material itself. Time to let it go.
- Visible scratching or cloudiness on the inside — scratched surfaces harbour bacteria in places your brush can’t reach.
- The seal has lost its shape — rubber seals degrade over time and stop creating a proper seal. If your shaker leaks or the lid doesn’t sit as tightly as it used to, the seal probably needs replacing (or the whole shaker does).
- Discolouration that doesn’t clean off — staining from berries, greens, or turmeric-based supplements is cosmetic, but it often indicates surface degradation that goes deeper than the stain.
- Cracks or damage — any crack, no matter how small, is a hiding spot for bacteria. If you spot one, replace the shaker immediately.
A well-maintained stainless steel shaker will last significantly longer than plastic — years rather than months. If you’re replacing plastic shakers every few months because of smell or wear, the long-term value of upgrading to steel is worth considering. Our guide to choosing the best protein shaker covers what to look for in more detail.
Quick-Reference Cleaning Cheat Sheet
For the days when you just want the short version:
- Immediately after use — rinse with water. Every time, no exceptions.
- Daily — disassemble, wash all parts with warm soapy water and a bottle brush, rinse, air-dry with the lid off.
- Weekly — deep clean with baking soda and vinegar (or a denture tablet soak) to prevent odour build-up.
- Monthly — check the seal, lid threads, and mixer for wear. Replace any parts that are degraded.
- Always — dry completely before reassembling. Store with the lid off.
Keep It Simple, Keep It Fresh
A clean protein shaker isn’t about obsessive scrubbing or expensive cleaning products. It comes down to three habits: rinse immediately, wash properly, and dry completely. Get those right, and the deep cleans become occasional maintenance rather than emergency rescues.
And if you’re starting fresh — or finally retiring the plastic shaker that’s been holding onto gym-bag memories — choosing the right material makes the whole process easier from day one. There’s a reason stainless steel has become the go-to for people who are done fighting with lingering smells. A non-porous surface, no odour absorption, and years of reliable use. Sometimes the simplest upgrade is the most effective one.
Your shaker works hard for you. A few minutes of care keeps it working well — and smelling like absolutely nothing. Which, when it comes to protein shakers, is exactly what you want.
References
- Food Standards Agency. (2024). BPA in plastic. Food Standards Agency. View source
- BioCote. (2023). Hygienic protein shaker bottles: contamination and microbial risk in drinking vessels. BioCote. View source
- SSINA. (2023). Sustainability: stainless steel recyclability and environmental value. Specialty Steel Industry of North America. View source
- KitchenSanity. (2024). What is food-grade stainless steel? Is it safe?. KitchenSanity. View source